If you’re looking for a simple, classic, and versatile pattern for knitting socks, you’ve come to the right place. Vanilla Socks are the perfect choice for beginners taking their first steps into the knitting world, as well as for experienced knitters seeking a relaxing, uncomplicated project.
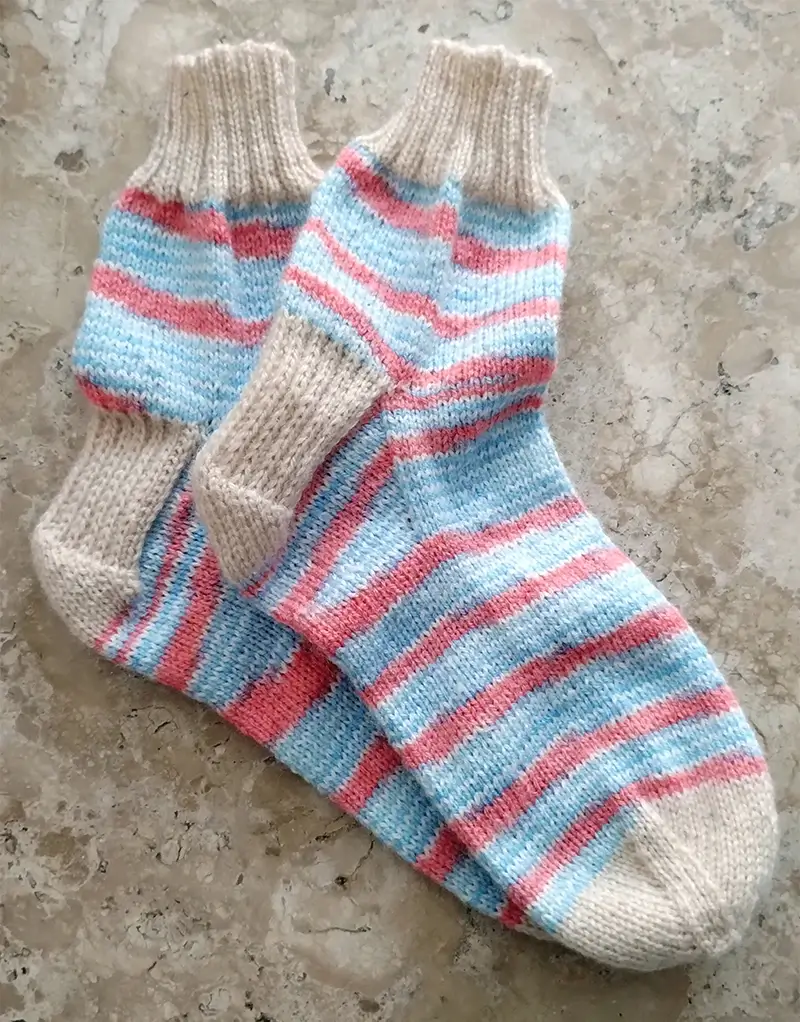
In this post, I’ll share with you the free pattern for knitting these basic socks, known for their simplicity and elegance. Vanilla Socks are knitted in stockinette stitch, without complex patterns or designs, making them ideal for those who want to practice fundamental knitting techniques while creating something useful and beautiful.
The pattern includes video tutorials to help with specific techniques, such as elastic cast-on, stockinette stitch, and grafting.
The complete step-by-step instructions will be available here and on the YouTube channel.
Since the video is quite long, I’ve divided it into several parts and will release them gradually.
So, grab your needles and yarn, and let’s start knitting!
Why Vanilla Socks?
In knitting, the term Vanilla Socks is used to describe basic, simple socks, usually knitted in stockinette stitch and without complex patterns or designs.
The name “vanilla” comes from the idea of something that is basic or standard, much like vanilla ice cream is considered the simplest and most basic flavor.
It’s a way to indicate that the sock is unadorned, functional, and simple to make, ideal for beginners or those who want an easy, straightforward project.
Get the pattern PDF YouTube Video
What you need to know?
Circular Knitting
Knitting in the round with circular needles and magic loop, or using double pointed needles.
Knit stitch and 2×2 ribbing
You need to know how to knit the stockinette stitch and 2×2 ribbing.
Decreases
Decreases are made right-leaning (k2tog) and left-leaning (SSK).
Grafting
Invisible seam for finishing the sock.
Material
Yarn
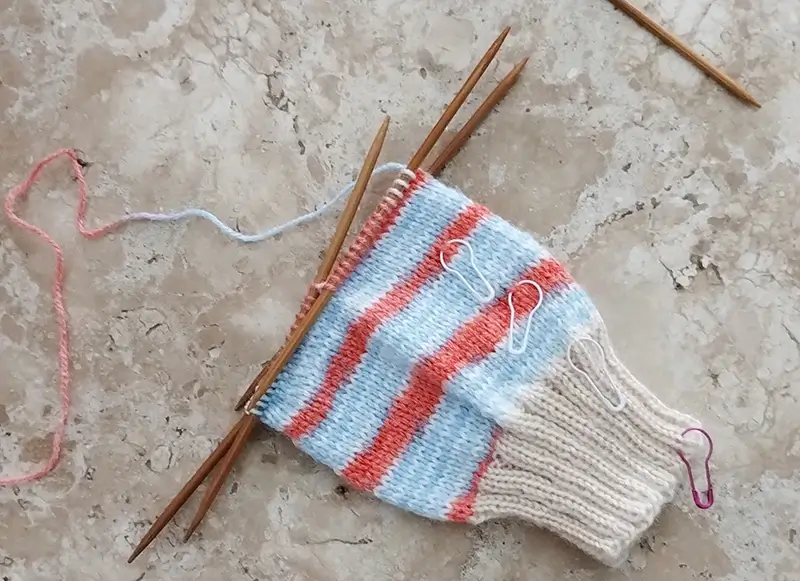
Pingouin Keamor 40g 210m (Brazilian Brand).
You can use any fingering weight yarn; just swatch first to get the right gauge with 2.75mm needles.
If you don’t get gauge, switch to smaller or larger needles.
Circular needles (80cm) or Double pointed needles
2.5mm (cuff) and 2.75mm
Stitch markers
1 color to mark the beginning of the round, 4 markers of the same color to mark where to decrease (optional), and several others of a different color to mark/count rows (optional).
Swatch
Swatch made in circular knitting, in stockinette stitch, with 2.75mm needles.
10cm = 30 stitches
10cm = 42 rounds/rows
It is recommended to make the swatch in circular knitting.
If you make the swatch in flat knitting, there might be a difference in the number of stitches and rows. Most people have a different stitch tension when knitting in the round compared to flat knitting.
Sizes
The sizes below are a standard average.
If you want to make custom-sized socks with specific measurements, you need to knit a sample and make calculations based on the foot measurements.
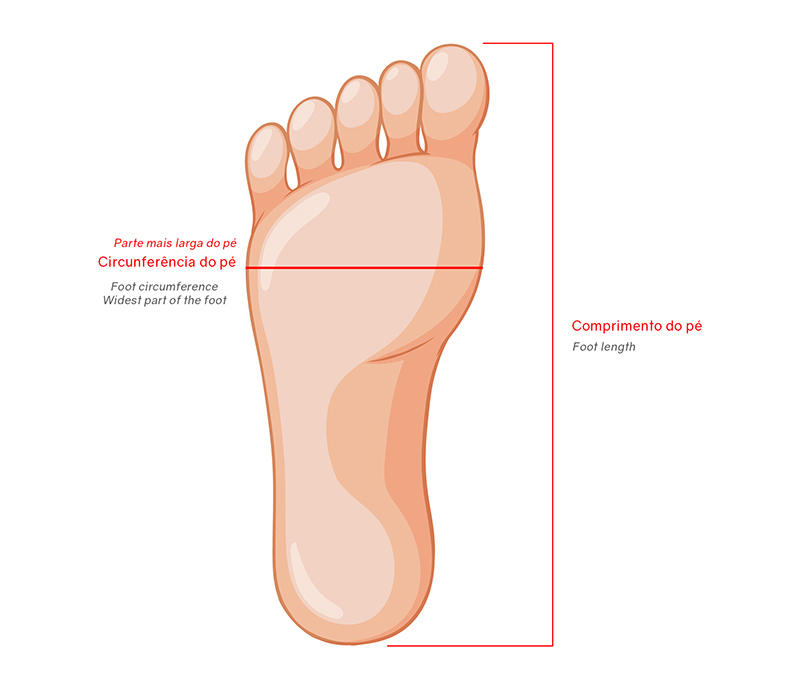
| Size | Foot circumference (cm) | Foot length (cm) |
|---|---|---|
| S | 21 | 23 |
| M | 22 | 24 |
| L | 23 | 25 |
| XL | 24 | 26 |
In the pattern, the stitches are written in the order S M L XL.
Example: (56) 60 (64) 68
This means: 56 is for size S; 60 is for size M; 64 is for size L; and the last number 68 is for size XL.
The number outside the parentheses and in red is for size M, which was used to write this pattern and appears in related photos and videos.
Note: This pattern is written based on 90% of the foot circumference, meaning 10% smaller than the actual circumference. This is done to ensure the sock fits snugly on the foot. If you prefer a tighter or looser fit, you’ll need to recalculate the stitches according to your preference.
Get the pattern PDF YouTube Video
Stitch Instructions
SSK (slip slip knit)
To slip 2 stitches knitwise with yarn in back (one at a time), then knit these 2 stitches together through the back loop.
Pattern
Cast On
Make a stretchy cast on with (56) 60 (64) 68 stitches.
Divide the stitches onto the needles.
Division of stitches on circular needle:
(28) 30 (32) 34 stitches on each needle.
Division of stitches on double-pointed needles (DPN):
(14) 15 (16) 17 stitches on each needle.
Cuff
Knit 20 rounds in 2×2 ribbing with 2.5mm needles.
This will give approximately 5cm in length.
If you prefer, you can knit directly with 2.75mm needles.
And if you wish, you can make this ribbing shorter or longer. This length is just a suggestion and can be adjusted according to your preference.
Leg
Switch to 2.75mm needle (if using 2.5mm needle).
Knit 30 rounds in stockinette stitch.
This will give approximately 7cm in length.
You can knit fewer or more rounds, as desired.
Heel Flap
When you finish round 30, turn the work.
Now you will work back and forth rows, with the other half of stitches on hold until finishing the heel flap and turning the heel.
Slip the first stitch purlwise with yarn in front, than purl (27) 29 (31) 33 stitches.
After finishing this half of the stitches, turn the work again to start the heel portion.
Now you will work back and forth rows only on half of the total stitches, until finishing the heel flap and turning the heel.
Repeat the 2 rows below until you have completed (28) 30 (32) 34 rows for the heel:
Row 1:
*Slip the first stitch purlwise with yarn in back, knit 1 stitch*, repeat until the end of the row, finishing with 1 knit stitch.
Row 2:
Slip the first stitch purlwise with yarn in front, purl all remaining stitches.
When you finish the last row, turn the work.
Heel Turn
Now the heel turn will be made.
Row 1:
Slip the first stitch purlwise with yarn in back; Knit (8) 14 (15) 16 stitches;
Place a marker to mark the middle of the heel;
Knit 2 together; SSK; Knit 1 stitch;
Turn the work;
Row 2:
Slip the first stitch purlwise with yarn in front;
Purl 5 stitches;
Purl 2 together;
Purl 1 stitch;
Turn the work;
Note: Now, if you want, you can remove the marker.
Row 3:
Slip the first stitch purlwise with yarn in back;
Knit to 1 stitch before the “gap” created when you turned the work;
SSK (with 1 stitch before and 1 stitch after the gap);
Knit 1 stitch;
Turn the work;
Row 4:
Slip the first stitch purlwise with yarn in front;
Purl to 1 stitch before the “gap” created when you turned the work;
Purl 2 together (with 1 stitch before and 1 stitch after the gap);
Purl 1 stitch;
Turn the work;
Repeat rows 3 and 4 until all the “side” stitches on the needle are completed.
After finishing, the heel should have (16) 18 (18) 20 stitches on the needle.
Gusset (Part 1)
When you finish the heel, turn the work;
Knit (8) 9 (9) 10 stitches.
Place a marker to indicate the beginning of the round for the gusset.
Use a marker of a different color so you know that this is now the beginning of the round.
After the marker, knit (8) 9 (9) 10 stitches.
On the side, pick up (14) 15 (16) 17 stitches, place a marker of a different color than the initial round marker (to indicate the decrease point), and pick up 1 more stitch to reduce the gap that forms at the heel-to-foot junction.
Knit the (28) 30 (32) 34 stitches for the front of the foot that were on hold.
On the other side, pick up 1 stitch to reduce the gap that forms at the foot-to-heel junction, place a marker in the same color as the marker on the other side (to indicate the decrease point), and pick up (14) 15 (16) 17 stitches on the side.
Finish the round by knitting the last (8) 9 (9) 10 stitches up to the beginning round marker.
Now we will alternate between 1 regular round and 1 round with decreases.
Gusset (Part 2)
Round 1:
Knit a full round in stockinette stitch, without increases or decreases, until you reach the beginning round marker again.
Round 2:
Knit until 2 stitches before the first marker.
Knit 2 together.
Slip the marker.
Knit to the next marker.
Slip the marker.
SSK.
Knit to the beginning round marker.
Repeat rounds 1 and 2 until you have the initial number of stitches on the needle.
On the circular needle, you started with (28) 30 (32) 34 stitches on each needle, so you need to finish the gusset with the same number of stitches.
On double pointed needles, you started with (14) 15 (16) 17 stitches on each needle, so you need to finish the gusset with the same number of stitches.
When you reach the required number of stitches for the size you’re knitting, remove the beginning-of-round marker, knit in stockinette stitch for an additional (14) 15 (16) 17 stitches, and then place the beginning-of-round marker at that point. This will make the round start again from the same place where you started knitting the cuff.
The gusset will be completed with a total of (18) 20 (20) 22 rounds.
Foot
Knit (46) 48 (50) 52 rounds in plain stockinette stitch, without decreasing stitches.
Toes
For convenience, add markers where decreases will be made (optional).
Place 1 marker after the first stitch.
Count (22) 23 (24) 25 stitches and place another marker.
Count 2 stitches and add another marker.
Count (22) 23 (24) 25 stitches and place another marker.
Now we will alternate between 1 round with decreases and 1 regular round to finish the sock.
Round 1:
Knit 1 stitch, slip the marker, and SSK.
Knit to 2 stitches before the next marker (3 stitches before completing half of the stitches).
K2tog, slip the marker.
Knit to the next marker.
Slip the marker and SSK.
Knit to 2 stitches before the next marker (3 stitches before completing half of the stitches).
K2tog, slip the marker.
Knit 1 stitch.
Round 2:
Knit a full round in stockinette stitch, without decreasing.
Repeat rounds 1 and 2 until you have a total of (16) 20 (20) 20 stitches on the needles.
Grafting
Leave a yarn tail approximately 4 times the length of the “gap” where the grafting will be done and cut the yarn.
Now you can perform the grafting to close the sock.
If you prefer, you can sew from the inside to close the hole at the toes, but this will create a ridge and may be uncomfortable for some people.
Finishing
After finishing the grafting, turn the sock inside out and weave in the ends.
Finished!
Congratulations!
You have completed one sock.
Now just repeat the steps for the other foot.

Follow me